Showing posts with label cheese. Show all posts

Tuesday, April 23, 2013

Delicious Baked Manicotti


So, besides my post yesterday I know it's been awhile since you've seen me post anything on here! It's not because we've taken a hiatus from eating or cooking, it's just that as soon as the weather here in OK started to get more "Spring" like, I can't keep myself inside or sitting still! As someone who has spent her entire life loving the outdoors, I think it's SO important to put down the iPad, tablet, computer or whatever it is that keeps you inside and go outside and take some time to stop and smell the roses! 


We've been fishing, hiking and cooking out with friends and family already this Spring, and there will be much more of all that as the season for outdoor living has just begun! Today is yucky, so I'm taking this downtime to put up a new recipe! I grabbed this recipe from Mel's Kitchen Cafe, and she has so many good recipes on there it's hard to chose where to start! Let's get started with this one!

Ingredients
Tomato Sauce
 
1 28-ounce can diced tomatoes (in juice)
1 28-ounce can crushed tomatoes
2 tablespoons extra-virgin olive oil
3 medium cloves garlic, finely minced
1/2 teaspoon red pepper flakes, optional
1/2 teaspoon salt
2 teaspoons dried basil 
    Cheese Filling and Pasta:
3 cups part-skim ricotta cheese
4 ounces grated Parmesan cheese
8 ounces shredded mozzarella cheese
2 large eggs , lightly beaten
3/4 teaspoon table salt
1/2 teaspoon ground black pepper
2 tablespoons chopped fresh parsley leaves (or 2 1/2 teaspoons dried parsley)
2 teaspoons chopped fresh basil (or 1 teaspoon dried basil)
16 no-boil lasagna noodles
 
Make sure you have a rack in the middle of your oven and pre-heat it to 375 degrees. 
 
In a large saucepan heat the oil, pepper flakes and garlic over medium/high heat! You are wanting this to get fragrant, not so much brown! It should take about a minute or two to get that first wonderful whiff of deliciousness! Now throw in your tomatoes, salt and dried basil and allow to simmer for about 15 minutes or until sauce has thickened (not too thick just slightly). 


In a medium sized bowl stir together the ricotta, mozzarella cheese, 1 cup of the Parmesan cheese (1/2 of what the recipe calls for), eggs, salt, pepper, and herbs! Set this mixture to the side.


Now for the assembly!! n a 9x13 pan, pour about one inch of boiling water into the pan. Add your noodles one at a time, making sure they don't all stick together! Let them soak for about 5 minutes or until you can "roll them" without them breaking! You don't want them to be completely cooked through because then they will break on you! 
 
 
Lay your noodles out on a paper towel or dish towel to dry off and discard the water in the pan. Make sure your pan is dried and clean to start the assembly process. Add just enough of the sauce to cover the bottom of your pan. It should be about 1 1/2 cups of sauce! Take a noodle and spoon about 1/4 c of the cheese mixture on the bottom of the noodle! This took some trial and error for me! I found the easiest way to do this was to spoon the mixture on about an inch from the bottom of the noodle. Spread it out a little with your fingers and start to roll the noodle! You'll have to figure out what works best for you! I made about 3 extra noodles just so I could practice a couple of times without losing any of our food! Place them on top of the sauce in the pan, seam side down! Cover with the remaining sauce and place aluminum foil over the pan. Bake in the oven for about 40 minutes and then remove the foil (CAREFUL: DON'T BURN YOURSELF WITH THE STEAM). Add the remainder of the Parmesan cheese, and bake about 5-7 more minutes or until the cheese is brown and bubbly. Remove from oven and let stand for a few minutes to cool! 
Serve and enjoy!


I'm going to try and start writing the night before so all I have to do before heading out is hit publish and we can be on our way! I love sharing our recipes with ya'll and you've given me such an overwhelming response that I want to make sure to keep it up! I've got to figure out what I'm going to do to make up for the photo challenge this month. Maybe next month I will take 2 pictures a day and go from there!

Until next time...

~Happy Eating~
 
--"Study nature, love nature, stay close to nature. It will never fail you"-- 
~Frank Lloyd Wright~


Monday, February 11, 2013

Date Night with Homemade Pizza--Cope Style

Remember our friend's the Cope's, who gave us that wonderful roast recipe awhile back during the holiday season? Well, they've done it again! Except this time they had a lovely date night with some Pizza and champagne and we get to share their experience (via lots of pictures and descriptions of the fantastic food)! I love getting beautiful photos from Full Feather Photography and I'm always more than happy to get a guest chef on here! The mixtures they used were from Wildtree, and look absolutely divine! If you're unsure what Wildtree is, (as was I) they are a company that provides all natural alternatives to your cooking lifestyle! Their products are free of fillers and additives which helps promote a healthier lifestyle. She started the company after finding that her two younger children needed specific dietary restrictions in their diet, and it took off from there. As a household that uses many natural alternatives to our everyday life, I'm excited to get to know more about this company and their products!  So let's get on with it, and make us a pizza!!!

Pizza Sauce 
1 (14.5 oz) can of Tomato sauce
1 TB of the Wildtree perfect pizza sauce seasoning


In a small bowl, you're going to combine the tomato sauce with the pizza sauce seasoning, mix together and let the sauce stand for 5 minutes to get all the flavors incorporated together. As a plus side to this being pizza sauce, it can also be used for dipping, lasagna, or whatever your heart may desire! Tara said this made more than enough for their one pizza, so they are saving the leftover sauce for some ravioli!

In case you're interested in what pizza sauce was used, this Napa Valley Bistro brand is outstanding! I use a lot of their sauces with my pasta and have never been disappointed!

Hello sauce! Don't you look just absolutely wonderful!

Now, onto the Wildtree So Quick and Easy Pizza Dough

1 bag So Quick & Easy Pizza Dough Mix 
1/2 c very warm water (120-130 degrees F)
1 TBS Wildtree Grapeseed oil (any flavor)


To start off you're going to want to adjust the rack in your oven to the lowest possible position, and set the temperature to 500 degrees. Take your pizza stone and place it on the rack in the oven and heat the stone for 30 minutes before proceeding with it! In a bowl, mix together the dry mix for the dough, water, and Grapeseed oil. Whisk all this together until a ball of dough forms. 


Once you have the ball of dough, turn the dough out on a floured surface and knead for 2 minutes until it becomes smooth and elastic. (Okay, in very simple terms (just in case you need it lol), get the dough out of the bowl, lightly flour a surface area, and start working the dough with your hands until it seems smooth and stretchy). Cover the dough and let it rest on the floured surface for 10 minutes. 


After the dough has taken it's nap on your counter, flatten the dough using the palm of your hand! You're going to want to try and work the dough into a disc shape! Starting in the middle of the disc and working your way out, use your fingertips to press the disc until it's about 1/4 of an inch thick. 

How You Doin'??
There's a good reason why this chef is off the market ladies...
I see about 5 different reasons in this picture alone!


All together now:
 "When the moon hit's your eye, like a big pizza pie, that's Amore"

Using one hand to hold the dough, use the other hand to stretch the dough (carefully) outward until it has reached the desired diameter (eh-hem, I hate math terms sooo...Carefully stretch the pizza dough out until you have a dough that fits the size of the pizza you want)! 

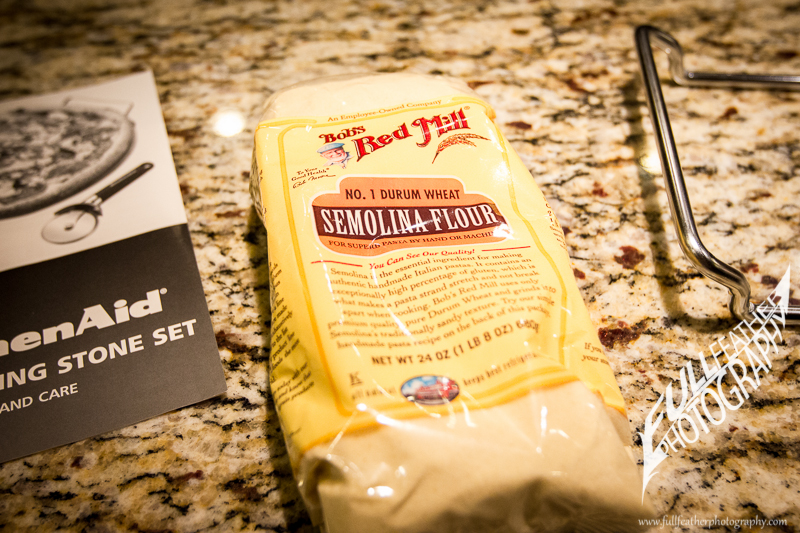
Now you're going to carefully lift the dough off the surface and place on a peel (looks a paddle for pizza), or you can place it on a large wooden cutting board that has been dusted with semolina. 


Now you're going to proceed with the pizza toppings! From the looks of the pictures, I'm gathering they had cheese, red bell pepper, pepperoni, onion and possibly some ground beef! 


The sauce is going on!

Here comes the cheese

All the extra goodies are on!

Once all your toppings are in place, slide the pizza onto the pizza stone, and bake for about 8-12 minutes or until the crust is a golden brown. 


There you have it! It looks so delicious, I wish I could just reach into the picture and take that piece right out of his hand! So making your own pizza may not be the fastest dinner on earth. However, think of all the endless opportunities you have when you make your own! We've had pizza parties before where everyone can come and make their own pizza and choose the toppings they want! Whatever you do, please please please don't be scared to make your own! A little birdie was telling they went with some friends many moons ago to a pizza making class and spent big money on it! Let me tell you this, save your wallet, and experiment with different dough recipes at home. The toppings are the easy part! But once you find a dough that suits you, you've got it made! The thing I have learned is that EVERYONE has their own secret to dough. My philosophy, if it works for you and tastes great, use it! I can't wait to get my hands on these ingredients and try it out! 

~Happy Eating~

Thursday, January 17, 2013

Dangerously Delicious Pasta Bake

I love pasta. I love cheese. I love tomatoes. I love garlic bread. I love lamp. (JK) Well I guess with my mixture of Italian and Japanese background it would be only right to share with you this pasta bake right after we had an Asian dish! It was delicious!! Each bite was full of flavor and definitely made enough to go around!! I found this recipe on Tracey's Culinary Adventure (still absolutely LOVING all her recipes)!  So let's stop the chit chat and get right down to it!!

Ingredients
1 (28 oz) can whole peeled tomatoes
1 lb. Italian sausage (Casing removed) hot or sweet
6 garlic cloves, minced
1/4 tsp red pepper flakes
1/2 tsp salt
3 C water
12 oz Ziti
1/2 c heavy cream
1 oz Parmesan cheese
Dash or two or three of parsley (flavor according to your liking)
4 oz Mozzarella cheese

Pre-heat your oven to 425 degrees.

Add your can of tomatoes to a food processor and pulse about 10-12 times until all the large pieces are broken down and you have "tomato sauce".


Set a LARGE skillet on the stove over medium heat. Add the sausage (casings removed) and cook until no longer pink. All the while take a wooden fork or spatula and break up the sausage as you cook. 

The casings are still on in this picture. The easiest way to remove them (if you never have) is to take a small knife and slide it under the casing the whole length of the sausage. If you try and peel it off it can get messy and squishy (couldn't think of a better word lol). This way once you have a slit the entire length of the sausage you can just peel it back and it comes right off! 

Once the sausage is cooked, go ahead and add in the garlic and red pepper. Cook about 30 seconds to 1 minute, or until it gets fragrant (I promise this won't take very long)! 

Garlic-I can smell it cooking just looking at it

Stir in your tomato blend and salt. Reduce the heat and simmer for about 10 minutes. 

I threw in some green onion at the last minute! Added color and little pop of flavor! 

Once you have simmered this mixture on the stove, add the 3 cups of water and pasta to the skillet (I told you that you would need a BIG skillet)!! Cover and turn up the heat back medium and cook about 15 minutes! You are going to want to stir this frequently or else it will all start to stick together and to the pan!!


After about 15 minutes (I checked the pasta to see if was soft) you're going to want to add the heavy cream, Parmesan cheese, and parsley. Stir this all together and season with salt and pepper

Heavy cream to help thicken the sauce

Okay, now if you have a skillet that is oven safe, you're going to want to top the pasta with Mozzarella cheese and place it in the oven for 10 minutes to bake. My skillet is NOT oven safe so I transferred mine to a baking dish, topped it with cheese and baked for 10 minutes! Threw in a couple slices of bread (in the toaster) to make garlic bread slices while the pasta was cooking! After the 10 minutes of cooking, your cheese should be melted and slightly browned on top! WARNING: this is a heavy dish and will make plenty! So, pace yourself!! I wanted to eat it ALL but also didn't want to wake up the next morning and only be able to fit in stretchy pants for the next few days! Moral of the story here: A small helping with go a long way because it's rich with flavor and the sausage adds some "meat" to any helping! (Sorry, no pun was intended there! That was cheesy (again sorry))!! Sheesh!! 

Pre-Bake

Right out of the oven

Ready to eat!

A good indication that it was delicious! 
Wiped the plate down with my last bite of bread (just in case you were thinking, Did she lick the plate clean?)

So, there you have it! A delicious weeknight meal that will last you and yours a couple of days!! Check back soon for a pork tenderloin recipe!! Until then...

~Happy Eating~


Friday, August 3, 2012

Venison (or beef) Stuffed Peppers

Sadly, I have come to the end of ground venison from last hunting season. This is one of the last recipes I was able to pull off with what we had in the freezer! Good thing hunting season is just around the corner! So I pulled this off a friend's Pinterest site and went to work! You know it's good when your man takes one bite and looks up to say, "You can feel free to make this anytime you want". I totally agree!! The thing about cooking with venison vs. cooking with beef is no matter how "lean" you buy the beef, you still always get grease! When I popped these in the crock-pot, there was almost no grease at all which made the peppers very yummy and not soggy. If you make it with beef, let me know how it turns out! We wondered where all the grease would go. Here is how to fix up these delicious peppers...


First you are going to start with 4 bell peppers. (Any color will do...I used red, green and orange). Cut off the tops of the peppers and remove the stem and seeds. Save the tops because you're going to want to dice them up to throw back in! Dice half of a yellow onion, then pour one cup of enchilada sauce over the onion in a bowl and microwave for about 5 minutes. Pour 1/3 cup of water into the bottom of your crock-pot, then nestle the bell peppers in. In a large bowl you are going to combine one pound of meat, the sauce and onion mixture, the chopped up bell pepper tops, one cup of shredded cheese, 3/4 cup of cooked rice, one and half teaspoons of salt and a half of a teaspoon of pepper. Now spoon mixture into the the peppers and top it off with more shredded cheese. Cook these yummy peppers on low for 6 hours (I actually didn't have six hours so I cooked mine on high for about 4 hours). Remove them from the crock-pot and eat up! I served it up with some homemade guacamole and chips and they were a hit!
Happy Green Pepper on a Plate
You can find the original recipe on a cute little blog titled no. 2 pencil 
Here is the run down:

4 bell peppers
1 pound of 85 percent lean ground beef

1/2 of a yellow onion, diced

1 cup of canned enchilada sauce

1 1/4 cup of shredded jack cheese

3/4 cup of cooked Mexican rice

salt and pepper

sour cream and diced green onion for toppings
Finely dice the onion place in a bowl and cover it with enchilada sauce. Heat in the microwave for 5 minutes.
Cut off the tops of the peppers and remove the stem and seeds. Finely dice the tops of the peppers and place in large bowl.
Pour 1/3 cup of water into the bottom of your crock-pot and nestle the bell peppers in (It might be a tight fit...it's okay)!
In the bowl with your chopped pepper tops add, meat, sauce and onions, 1 cup of shredded cheese, 3/4 cup of Mxican rice (cooked), 1 1/2 teaspoon of salt, and 1/2 teaspoon of pepper.
Fill peppers and cook on low for 6 hour. Top them with sour cream and green onions and enjoy!
~Happy Eating~ 

Also, if you have a hunter in the family as well and haven't discovered Game and Garden you really need to head on over to Stacy's blog and check it out! We saw her the other day on the outdoor channel and I immediately went out and looked up all the recipes I could find by her, and put her cookbooks (she is releasing a new one) on my WANT list :) She has some great ideas!! I can't wait to try more of her venison recipes once hunting season starts back up and we get more venison! We are getting ready to try one of her fish recipes...check back soon to find out how it turned out!

Friday, June 22, 2012

Mexican Stuffed Jumbo Pasta Shells

Hola! We made Mexican stuffed shells the other evening and they were so delicious! I'm going to share these flavor packed pasta shells with you because, I like you and because when you eat these scrumptious shells it is like a pinata of "goodie" flavor in your mouth!! You won't want to stop eating and may break out in a little happy dance when you're done!
 
Cook to this and you'll be in the fiesta mood in no time!

So, I found the recipe at The Way To His Heart which is a brilliant title and perfect for us because Dee Jay loves his food (as do I) and one way to his heart is through my cooking! Ya'll are going to laugh (or get tired) of me saying this, but again I used ground venison! Hey, when your man goes off hunting and brings home deer for you, you pretty much are guaranteed to have meat in your freezer for a VERY long time! You can use ground beef or turkey, whichever you prefer. So with all that being said and your music playing in the background like I know it is ;) here is how you make it...

You will start with one pound of ground beef which you will cook and drain. Throw it back into the skillet and add two tablespoons of taco seasoning and one cup of water (I made my own taco seasoning via her website link which I will give you ingredients for below). Stir this all around and then add 4 oz of cream cheese, cover, simmer and let the cheese melt. 

While you have that going go ahead and put 14-16 (I recommend at least 16 because I broke a couple of mine) jumbo pasta shells into boiling water and cook! (NOTE: I did not cook my shells long enough for them to get super soft. I left them a tiny bit harder so they wouldn't fall apart). When your cream cheese mixture is melted in the skillet remove the skillet away from the heat and let this mixture cool completely. 
Now, when your shells are done cooking, go ahead and drain them and lay them out on a cutting board or flat surface where they won't stick! In a 9x13 pan you are going to pour 1 1/2 cups of salsa into the bottom of the pan. Then CAREFULLY stuff each shell with about two teaspoons of the meat/cream cheese mixture. Place the stuffed shell on top of the salsa in the pan open side up. When all the shells are lined up in pretty little rows you are going to pour one cup of taco sauce over the shells and cover the pan with foil.
 
Place in a 350 degree pre-heated oven and cook for 30 minutes. Once your timer has gone off, CAREFULLY remove the foil and sprinkle one cup of cheddar cheese and one cup of monterey jack cheese. Place the pan back in the oven (uncovered this time) and allow to cook for 10-15 minutes more (I think I went with 12 minutes). During the last few minutes go ahead and chop up some green onions, get out some jalapenos, and or black olives (I wish I had the black olives but we didn't) and whatever else you would like to serve it up with. When they are finally out of the oven and cooled down a bit, plop a dollop of sour cream on top and serve it up and garnish it with goodies!! Sit back and enjoy the flavors!! YUM
 ~Happy Eating~

1 lb. ground beef
1 package low-sodium taco seasoning
4 oz. cream cheese
14-16 jumbo pasta shells
1.5 cup salsa
1 cup taco sauce (This is a smooth, tomato based sauce found in the Mexican section)
1 cup cheddar cheese
1 cup monterey jack cheese
3 green onions
Sour cream

Preheat oven to 350 degrees. Cook your beef and drain. Add seasoning and one cup of water. Add cream cheese then cover the skillet and simmer until cheese is melted. Blend it well and take it off the heat and let it cool completely. 

Cook the pasta-drain and set shells out on a cutting board

Pour salsa on bottom of a 9x13 pan. Stuff each shell with meat mixture and place the shells open side up on top of the salsa. Cover them with taco sauce, cover the pan with foil and bake for 30 minutes. Add shredded cheese and cook uncovered for another 10-15 minutes or until cheese is melted.  Add green onion (and whatever else you like) and sour cream. Serve and ENJOY

TACO SEASONING 
4 Tbsp Chili Powder
3 Tbsp plus 1tsp paprika
3 Tbsp ground cumin
1 Tbsp plus 2 tsp onion powder
1 tsp garlic powder
1/4 tsp cayenne pepper

COMBINE (For one pound of meat you will use two heaping tablespoons of seasoning and one cup of water)!

Friday, May 18, 2012

A Side and an Appetizer

I had a very random cooking afternoon today as I perused a cookbook I stumbled upon in a moving box of mine. The sausage balls and Zucchini just looked too good to pass up. I snacked on the Zucchini (which was wonderful) while making the sausage balls, hoping I would be too full to devour them when they were finished because I have a birthday party to go tonight and need my stomach empty for the great flavors of The Cheesecake Factory. The cookbook is one my parents church put together titled, Tasteful Traditions by the Fellowship Bible Church in Tulsa. The Zucchini saute recipe comes from a lady named Brina Osborne and is absolutely delicious. Here is how to make it...

You start with 1/4 of a cup of butter and melt it in a small/medium skillet. You're going to add 1/2 of a cup of chopped onion (I also minced a clove of garlic and tossed it in with it) and let it simmer until the onions are crisp-tender in the butter.

While that's cooking you will add 3 cups of chopped Zucchini, 1/2 teaspoon of Italian Seasoning, 1/2 teaspoon of salt, and 1/4 teaspoon of garlic powder. Stir this all together and let cook for 4-5 minutes.

When it's finished, I put them out on plate and sprinkled Cheddar cheese on top (which instantly melted into a gooey delicious mess)! She also added 1 cup of fresh diced tomatoes to hers but I was down to 1 tomato in the fridge and needed it later for something else so I omitted this ingredient. The taste is delicious, and it was super fast and easy to make! I love zucchini so I am very excited I decided to try this because it makes such an excellent side dish for dinners or you could make a big pan of it if you needed something quick to take to a dinner somewhere.
 Brina's Cheesy Zucchini Saute
1/2 c Chopped Onion
1/4 c Butter
3 cups Chopped Zucchini
1/2 tsp. Italian Seasoning
1/2 tsp. salt
1/8 tsp. Garlic Powder
1 (4 ox) cup shredded cheese
1 cup Diced Fresh Tomato

Saute onion in butter until crisp-tender. Add zucchini and spices, cooking 4-5 minutes. Sprinkle with cheese and tomato.

Onto the sausage balls. I will keep this short and sweet :)

You take two pounds of sausage (one pound hot and one pound regular), 3 cups of Bisquick and 24 oz. grated Cheese and mix this all together. I threw everything in at once and it took me FOREVER to get it all mixed in. So I would suggest mixing in little bits at a time. Mash, knead, jump up and down on the meat until you have everything mixed together! You will roll this mixture into 1 inch sausage balls and place on a cookie sheet. I baked mine for 8 minutes and then flipped them over (with tongs because they're going to greasy and hot) and let it cook for 6-8 minutes more. Simple, easy, and fabulous for parties or if it just sounds good. I think (via an idea from Dee Jay) we are going to throw ours in with some spaghetti and sauce and have cheesy sausage ball spaghetti for dinner. Another idea I had was to put 2 or three on top of some grits (yes I love grits of all kinds...That's why I'm from the south lol) because they taste a little like breakfast. I think that is just because it uses Bisquick and I associate that taste with breakfast. Or you could probably top of some white or brown rice with these delicious goodies and go to town! Any way you decide to make them, bake them and serve them up is up to you. This was just our idea.
~Happy Cooking~
 PRE-COOKED
 Cooked (Placed on paper towel to help soak up the grease)

Sausage Balls by Paula Kreitzer 
1 lb. Hot Sausage
1 lb. Regular Sausage
3 c. Bisquick
24 oz. Grated Cheese (I used Cheddar although next time I think I'm going to mix it up)

Heat oven to 375 degrees. Mix all ingredients. Form into 1 inch balls with a cookie scoop (or your hands). Bake on cookie sheet for 5-20 minutes. (Remember I did 8 minutes on one side and 6 on the other).