Showing posts with label snack. Show all posts

Friday, March 22, 2013

Fried Honey and Cinnamon Bananas

Okay, so this isn't exactly a "fried" banana more of a heated through banana! It's delicious and healthy! I pinned this awhile back, and couldn't wait to try it, so today was the day! You can see the health information on this snack at The Crohn's Journey Foundation's website! They break down each ingredient with all the nutritional facts about each one! It's worth the read even if you don't make this yummy snack! Let's get started...

Ingredients
One organic banana
Coconut Oil Cooking Spray
1 TB Organic honey
1/2 TB water
Cinnamon

Cut your banana into small rounds and set aside. In your skillet spray your coconut oil spray, and heat the skillet over medium/high heat. Add the banana rounds and brown on one side. Once they are browned, flip the over (carefully) and start browning the other side. Turn the stove off at this point and add your PRE-MIXED honey and water. At this point it's going to start getting very bubbly, and once that dies down you can sprinkle on the cinnamon. If you LOVE the taste of cinnamon be generous, if you are just adding for a touch of flavor, a light dusting will do! Remove them from the pan and let them cool, then enjoy! 

Honey and water mix

I didn't have the cooking spray, so I added a little bit of coconut oil to the pan! I use this for SOOOO many things including, toothpaste, hair conditioner, lotion, sunscreen, etc etc! It's awesome!

Here is the banana in the skillet getting browned! 

I LOVE cinnamon! If you'll take my advice and read up on the website where this recipe was pulled, you'll find that you might start adding cinnamon to recipes when you can :) I've added it to sloppy joe mix before and it was awesome! If you like Coney Island, did you know they add cinnamon to their chili!? (Not that that will make their coney's healthy lol but they are delish!)

Here it is just finishing up! I can still smell ALL of the ingredients in the house! 

Stay tuned for a new recipe...Shrimp & Grits! 

Until then...

Wednesday, March 20, 2013

Roasted Chickpeas

So, I'm trying this on my phone today because our computer is up at the office! I cannot get enough of these sweet and salty chickpeas!! They are easy to make, and a great idea for a snack at home or you could double/triple the recipe to take to a party! Lets get started!

Ingredients:
I can of chickpeas
2 teaspoons olive oil
1 teaspoon cinnamon
1 1/2 teaspoon brown sugar
1/4 teaspoon of salt

To start out you're going to drain the can of chickpeas and then scatter them out on a cookie sheet covered in parchment paper. Bake at 450 degrees for 30 minutes. The last can I made I had to bake for about 32-35 (the chickpeas around the edges might get burned, just remove them and pop the sheet back in.) You are looking for them to have a crunch! Once they have roasted let them cool and put them in a small bowl. Add the olive oil, cinnamon, brown sugar, and salt and stir together. Serve and enjoy!! I about took down a whole can by myself the first time I made these! I originally came across this recipe at cupcakeproject.com! If you check out her recipes you will quickly find she puts together things that might seem out of the ordinary, but end up being satisfying and delicious! Stay tuned for more great recipes this week!! Until then...

Happy Eating


Tuesday, March 5, 2013

Mom Tested & Kid Approved Smoothie


A good friend of mine sent me some pictures and directions to a smoothie she made the other day! 
I honestly can't wait to try this out simply because I've never thought of adding grapes to my smoothies! I LOVE grapes! I think my favorite thing to do is to freeze them then take them with me as a cold snack on hot summer days! YUM! So let's see how to put this smoothie together!

Ingredients
1 frozen pineapple puree packet
1 cara cara orange peeled
Small bowl of black seedless grapes (about a cup)
About 1/4 c of vanilla yogurt
Splash of almond milk
1 1/2 c of ice cubes

Put all this in your blender, and blend until you have your desired consistency! 
Her stand point is that this tasted like an Orange Julius, only better! I'm sold!

This can be found in the frozen section at select grocery stores!
If you have a Reasor's...that's where this particular bag came from

Cara Cara Navel Oranges! Delish


Boomer Sooner Realtree Mug! Looks so good (the mug and the contents lol)

I do believe she likes it! Almost getting a thumb's up from this sweet girl! 

Stay tuned for some more great recipes!
Until then...

Wednesday, February 27, 2013

Pineapple-Banana Smoothie


Smoothie Time!! 

This was a great pick me up yesterday when I was starting to run out of energy!
If you are wondering what all the health benefits are that you might get from a pineapple, then check out this information on Livestrong! You will be very happy to know that this whole smoothie is very low in calories (147 for one serving), and packed with benefits for your health and well being! 

Ingredients
1 1/2 c fresh diced pineapple
1 Banana
1/2 c yogurt
1/2 c of blueberry pomegranate juice
10 ice cubes

(I picked this up in the refrigerator section at the store in a single serving container because it sounded to good to pass up. I decided later that night I would rather put in a smoothie to add extra flavor. Great decision!!)

Throw all of these ingredients in your blender, and pulse until you have the texture you like. I couldn't drink it fast enough! 

Positively Refreshing!

Stay tuned tomorrow, for another round of tortellini crock-pot soup! My best friend was looking for the recipe I put on the blog awhile back, and made a different one by mistake! So we're going to give it a go to let you know the difference! (The pin on Pinterest said that it is the BEST CROCK POT recipe they have made in awhile. I'm game for anything that people think is THE BEST lol.) 

Until then...

Saturday, February 16, 2013

Tasty Fried Zucchini

It seems like zucchini has been all over Pinterest lately. A good reason why is that zucchini is packed full of nutrients for your body! Want to know more? Check this article out on Livestrong.com and tell me you don't want to stuff your face with it! We went borderline "healthy" and decided on a fried zucchini recipe from the Neely's on Food Network. About 4 thick slices is 150 calories, 9 grams of fat but you still get the fiber, vitamin A, vitamin C, calcium and iron! So we're still on the board for having a somewhat healthy snack! This is a bit more time consuming for an afternoon snack than I would normally go for but it was completely worth it! Let's get started!


Ingredients: 
Oil For Frying (we used our mini-fryer with Canola oil)
3 large zucchini (slice into small rounds)
1/2 c all purpose flour
1 1/2 c Panko bread crumbs
1/4 c grated Parmesan Cheese
2 TB finely chopped Parsley
1/2 tsp. red pepper flakes
Salt & Pepper
3 eggs-lightly beaten
1/4 c water

Dipping Sauce
1 c sour cream
2 TB Butter milk 
(I had to make my own which is one cup of milk with 2 TB of white vinegar. Let sit for about 15 mins)
(I didn't have shallots or chives but she calls for them. We thought it tasted just fine without it. I did add a little minced onion in there!)
1/4 tsp. cayenne pepper
Dash of hot sauce
Salt and Pepper

Here is how we did this:

We started with the bowl of flour at one end, followed by the egg and water mixture, and then finally the breadcrumbs with all the seasonings in the final bowl. 

Once your zucchini is sliced into rounds, you're going to want to coat the slices in flour, then dip each round into the egg/water mixture. After you have each piece coated, you're going to add to the Panko and spices bowl and make sure it covered in all the goodies! (I added a little more Parmesan cheese at this point because I didn't think it looked like enough). Once all your pieces are covered we put ours down in the frying oil for exactly 3 minutes. They turned out beautifully! 

Each piece is packed with flavor and the dipping sauce compliments this perfectly!

To make the dipping sauce, all you need to do is mix all the ingredients together and chill in the fridge. It says to chill for one hour, we chilled as long as it took to make the zucchini (about 15-20 minutes). 


Stay tuned tomorrow for the photo challenge update!
Until then..


Monday, June 18, 2012

Strawberries filled with Oh My Goodness!!


I think always and forever strawberries will be one of my favorite foods! They are just enough sweet, juicy, crunchy, and delicious! There are many ways to fix strawberries. My all time favorite go to is to clean them, and put a dollop of sour cream on a plate and a dollop of brown sugar and use both as a dip! My mouth is watering just thinking about it! I saw this recipe the other day and decided to make a plate and let me tell you folks we devoured these bad boys in about two minutes! Sadly, we didn't even put them in the fridge to chill because we both wanted to "try one" and then just couldn't stop ourselves! So for a fun and easy afternoon snack (or you can make a whole bunch of them for a cookout party or family get together) here is what you're going to do...

First off clean the strawberries in a strainer and pat dry. Next slice the top of each strawberry so that it has a nice flat surface and place them on a hard surface. Now you're going to take your knife and cut an "x" in the top (which is literally the bottom) of the strawberry. Don't cut all the way through just enough so you can open it up to make a "pit" to fill up!
These are cut you just can't see it very well
 Just trying to show you how you open them up once they are cut

In a small bowl you are going to mix 11 ounces of softened cream cheese, 1/2 of a cup of confectioners sugar (powdered sugar), and 1/4 of a teaspoon of almond extract. You are going to beat this mixture until it becomes nice and fluffy! After you have it mixed, spoon it into a small Ziploc bag and cut the corner of the bag off to make a piping tool! (This part is much easier if you have two people working on it). Have one person open up the strawberry like in the photo above. The other person is going to "pipe" the cream cheese mixture into the middle of each strawberry and once you have the amount you want close the strawberry and it will ooze out the sides and the top. 
Once you have all the strawberries filled you are going to take a block of your favorite chocolate (we used semi-sweet although dark chocolate would be divine) and grate the chocolate over the strawberries to give them a nice chocolatey dusting!
Once you have all the strawberries filled and sprinkled you will want to stick them in the fridge to chill BEFORE you try one and eat them all up and then take them out about an hour later or when you're ready to serve them up! Your mouth, friends and family will thank you for these delicious delights! (You can add your own flavor of extract like orange or whatever tickles your fancy).
I got this recipe off of TasteofHome.com and my Pinterest page! Here is the run-down of these delicious summery snacks...
~Happy Eating~

3 dozen large fresh strawberries
2 packages (one 8 ounces, one 3 ounces) cream cheese, softened
1/2 cup confectioners' sugar 
1/4 teaspoon almond extract 
Grated chocolate


Cut the stems and tops off each strawberry and to make a flat bottomed strawberry and place on plate. Cut a "x" in the tops of each strawberry, being careful not to cut all the way through. 

In a small bowl combine the cream cheese, powdered sugar, and almond extract until fluffy. Pipe the cream cheese mixture into each strawberry then grate the chocolate over the tops for a light dusting!

Chill and enjoy!

Photo courtesy of walldesk.net

Wednesday, April 25, 2012

spring rolls - activity, dinner

Leah here. I'll typically pick a cool, herby spring roll over it's fried egg roll cousin. Have you tried a spring roll? A soft, chewy rice wrapper that neatly holds anything from crunchy veggies to herbs and even shredded chicken or cooked shrimp. I like making things you can make your own --like a big salad or homemade pizza. These types of meals are fun with friends or family, too. Lay out a big bowl of lettuce, a tray of baked potatoes or a slab of rolled out pizza dough. Line up the toppings and let everyone make their own creation. Throw spring rolls in to that category of "activity dinner."

To start, you need rice wrappers. They seem scary. Thin, wispy...and the packaging is typically not in English. Luckily, you can now find them at most supermarkets with a decent selection of Asian ingredients


I've used a few different spring roll recipes. Recently I tried this one from Williams Sonoma. It had a great tip about layering TWO rice wrappers for a sturdier roll. GENIUS! Decide how many rolls you want or need. I made six rolls and cut them in half making 12 half rolls. Plenty for hubs and me to snack on throughout the evening.

Prep all the ingredients you need for your roll recipe. This takes a bit of time. Give a few people a chopping, dicing or peeling job and it will go faster. Organize your ingredients in a line by how you will add them to your roll. You will thank me for this. I'm an old pro (ha!) so I just piled mine up on a plate. (an upside down plate, sorry, I'm no computer expert!)


My recipe called for green lettuce (tender butter lettuce would have been better here), cucumber, avocado, carrots shredded (would have been better as small matchsticks), basil, and mint. Also good in spring rolls--cilantro, thinly sliced jalapeno, rice  noodles...sky is the limit. These were vegetarian but I like cooked shrimp in mine.

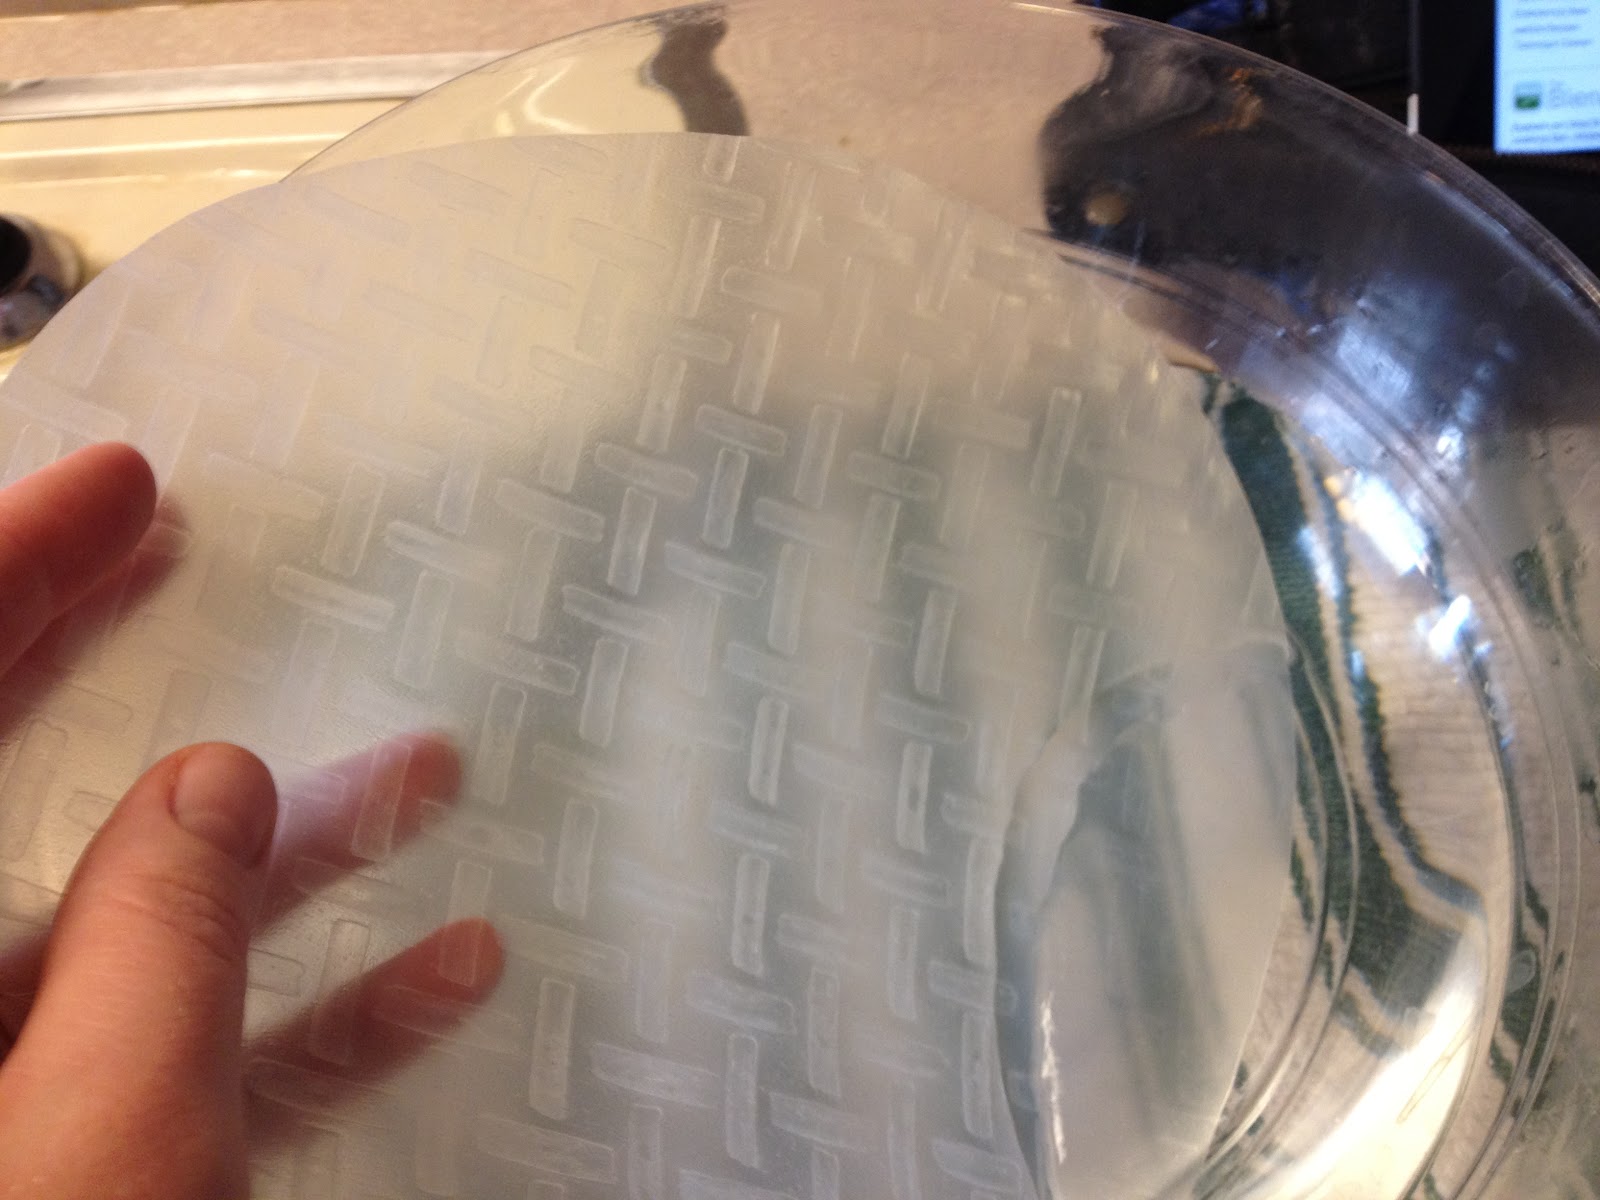
Fill a wide, shallow bowl with warm water. Lay a clean kitchen towel next to the bowl. Here is where things can get scary--be brave! See how the rice wrapper is hard and crunchy? You're about to give it a bath. 

Dip one rice paper round into the water for a few seconds to soften--about 20 seconds--then lay it flat on the towel. You want it to be the constancy of a wet paper towel. But not a wet tissue. Got that? Ha!


You might rip it but they are actually pretty forgiving. That's why I like the double wrapper idea. Dip a second wrapper into the water and lay it directly on top of the first one. Get ready to work quickly. 

For my recipe, I centered a lettuce leaf on top of the stacked rice papers. Starting about one-third in from the edge closest to you, arrange your herbs in a line across the lettuce. 


Top the greens with a small row of each of your veggies or meat. Here are my carrots, cucumbers and avocado. You don't need much so don't over stuff the roll.


Now, think burrito! Lift the bottom edge of the wrapper up and over the bottom third of the filling and then roll once tucking the veggies in.

Fold in the sides of the wrapper and continue rolling it and tucking it into a tight cylinder.


 Set aside, seam side down. They will start to dry out so another secret--cover them with a damp (not wet) kitchen towel or a few damp paper towels. You can even make these a few hours ahead if needed. Keeping them covered will keep everything fresh. When ready to serve, cut in half.

Keep stuffing, rolling and tucking and you'll get  a plate full of crisp, fresh, yums. 


The dipping sauce I made this time is actually miso dressing from Gwyneth Paltrow’s cookbook “My Father’s Daughter." It's not for everyone, but everyone (every peanut eater) should love this peanut dipping sauce I've used several times from Chow.com. Like what you see here? Then please start with his recipe for shrimp summer rolls---my favorite to date.

I love getting friends and family in the kitchen. What is our favorite activity meal? Grilling? Cookie decorating?